This article is for the people who would like to know how to sign a document as the recipient. If you are looking for instructions on how to send a document, please read this article.
*Note: You do not need to create a SignRequest account, or download any application, to sign a document. All you need is a valid email address to receive the SignRequest email with the link to sign the document... (see below).
1. Click on the blue 'Review Document' button in the received email

Alternatively, select or copy and paste the document link within the SignRequest email into your web browser.
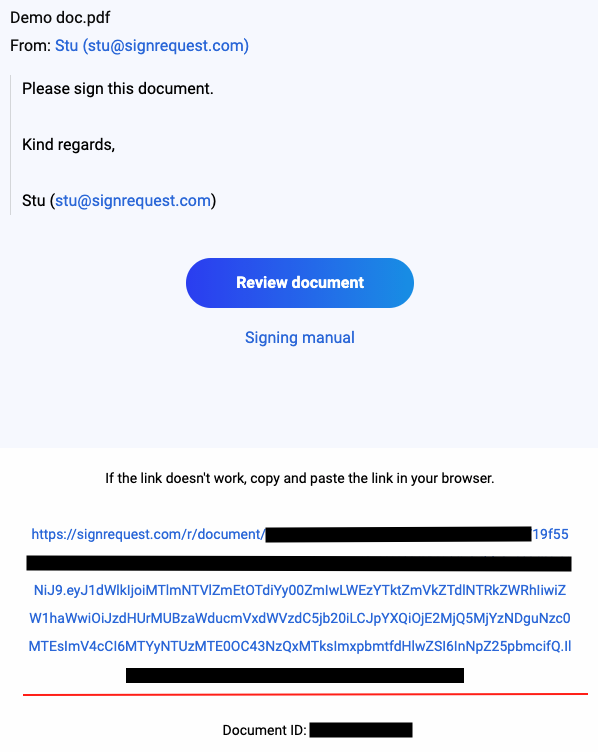
A new page will open, and you will be able to review the document...
2. Read the document and decide your next action
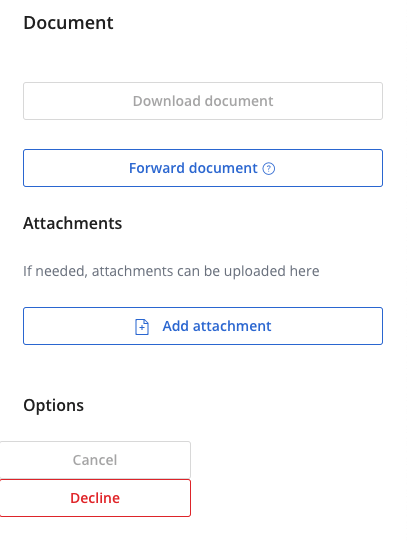
- Click 'Options' to cancel, decline, download, forward to a different signer, view an optionally added attachment or to add attachments yourself. See point 2.1 to learn more about these options.
- Sign the document, follow step 3.

2.1
"Download Document" will allow you to choose to download the document to your computer and print it or review it in another program like a pdf viewer. Note that this is not necessary as you will receive a copy of the signed document by email after all parties have signed the document.
"Forward Document" will allow you to forward the SignRequest to be signed by another person in your name. For more information about forwarding have a look here.
"Add attachment" will allow you to upload a file as an additional attachment to the SignRequest.
"Cancel" will take you back to the home page, but the document will still be available for signature later.
"Decline" will effectively 'close' the document. You will be given the opportunity to provide a reason to the sender as to why you would like to 'decline' the SignRequest. You will not have the option to sign the existing SignRequest in the future. If you decide you would like to sign it after first declining, your contact will need to send a new SignRequest.
3. You can sign by adding the necessary input
The sender of the document has 2 options before sending it:
- Only allow the signer to add input in predefined fields. (SignRequest highly recommends this option.)
- Allow the signer to add input wherever they would like to in the document.
3.1 Add input in predefined fields
An arrow will direct you to where you need to add input (text, date, checkbox and signature).
Click the input field that the arrow points to. A pop-up will open and you will be able to add a signature, date, text or checkbox.
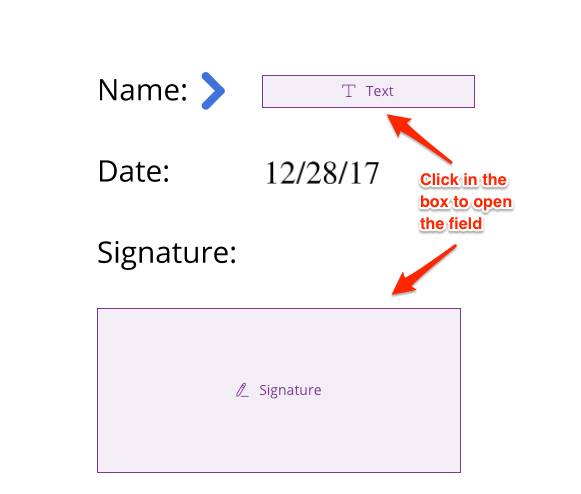
To add a signature you normally have 4 options:
- A previously used and saved signature.
- Draw a signature with your mouse(pad) or finger on a touchscreen phone or tablet. Using your phone or tablet usually creates the nicest signature. You don't need to download an app on your phone / tablet. You can simply use the mobile web browser.
- Type a signature.
- Upload a signature picture. This works best with a transparant image and allows you to add a 'real' signature which can be stored in your account.
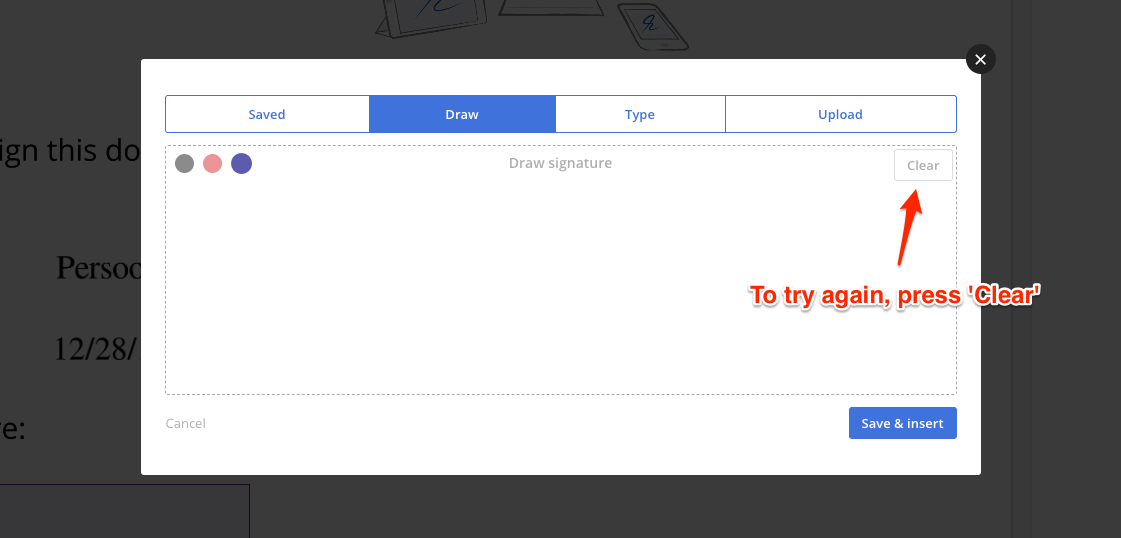
If you're not satisfied with the result you can try again by pressing 'Clear' in the upper right corner.
Note that for a valid electronic signature it's not necessary that it is exactly the same as your usual signature on paper. For more information about the legality of electronic signatures have a look here.
3.2 No input fields, add input wherever you want in the document (disregard if input fields and the arrow are visible)
This is the default option when the sender has not defined input fields for you. SignRequest highly recommends the sender to create input fields as it makes the signing process much easier, especially for first-time users.
Without input fields defined:
- Click in the document.
- Click on one of the icons to add text, a date, checkbox or signature.
![]()
- Click on the added input to resize the input if needed.
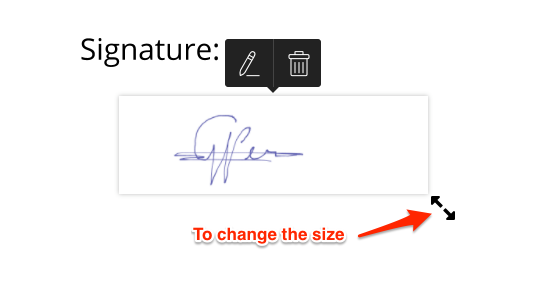
- Click on the added input to drag and drop the input to where it should be added.
You can add as many fields as you want, but at least one signature is mandatory to be able to finalize.
4. Finalize & confirm
After all required fields have been filled-out, you can click on the green 'Finalize' button.

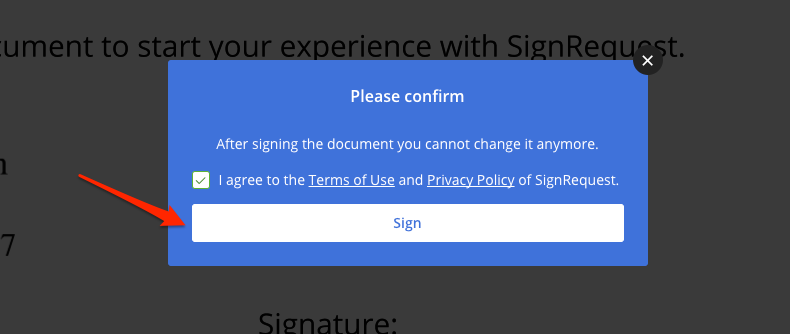
The very last step is to confirm that you want to sign the document. After this step the document has been signed and cannot be changed anymore.
6. After signing you'll receive a signed copy by email
You will automatically receive a copy of the signed document and the signing log as attachments by email. This email will only be sent after all designated signers have signed the document. So if you have signed but haven't received a copy yet then there still is another signer that needs to sign.
7. Legality of electronic signatures
Many countries have adopted regulations that make electronic signatures a legal alternative to signing documents on paper or for example the process of printing, signing and scanning the document.
Due to the added documentation, the fact that the contract cannot be changed during the entire process and the signed contracts are automatically stored in one place the process of electronic signing is often a more secure alternative to many conventional practices.
For more information visit: legality of electronic signatures.
8. Security of SignRequest
For more information visit SignRequest Security.
9. Start using SignRequest yourself
If you would like to start using SignRequest yourself then you can easily register for a free account on www.signrequest.com.
10. More questions
If you have any additional questions please have a look at our help center or contact us here.